
Getting started with Game Boy development on Mac
April 21, 2018
I don’t know what inspired it, but recently I got the idea that programming for an old game console would make for a fun project. Apart from giving me an excuse to write code in a language other than Python, it’s something I’ve wanted to do ever since I learned that programming was at the heart of all the great games I’ve played throughout the years. So, I decided to find out how feasible it would be to program for one of these old school gaming systems.
The Game Boy Advance was my first research subject. While reading up on the GBA, I learned that the original Game Boy (model “DMG-01”) had a more well-established homebrew community, compared to the Game Boy Advance. There is a lot of great documentation out there on developing for the Game Boy! Just visiting the awesome-gbdev repo convinced me to choose the original Game Boy as my retro coding platform.
I’d like to blog about my experience as a form of self-motivation. I’ll write about the process from the start and then be able to look back and see how I’ve progressed along the way! And if someone happens upon these posts, I hope they find them useful.
NOTE: I’ll be using the following Japanese-language blog post as a template for this one: 開発環境の導入.
Development Environment on MacOS
As the title says, I am working towards a functional GB dev environment on MacOS (specifically High Sierra, version 10.13.4). Sadly, most of the good tools for Game Boy development are Windows-only. But that’s okay! We can get away with using Wine to run the best of them.
An introduction to the tools
The development scene for the Game Boy is centered around two programming languages: C and assembly. My personal preference was to start developing in C. I’m using Harry Mulder’s Tile Designer as well as his Map Builder to manage the graphical aspects of developing for a video game console. Finally, the bgb emulator is the standard for testing and debugging Game Boy games.
Getting a C compiler up and running:
The tool of choice here is the Game Boy Developers Kit (GBDK). The installation may be tricky on MacOS. There are a couple of alternative installation methods around, but I went for the following:
$ git clone https://github.com/x43x61x69/gbdk-osx
$ cd gbdk-osx
$ mkdir -p sdcc/bin
$ sed -i '' -e '1005d' sdcc/src/SDCC.y
$ make
$ sudo mkdir /opt && sudo cp -r build/ppc-unknown-linux2.2/gbdk /opt
make will proceed to build GBDK. Note that the above commands do some extra stuff besides building the compiler libraries. Click on them below to learn more about why they are required if we want the build to succeed.
sed -i '' -e '1005d' sdcc/src/SDCC.y
sudo mkdir /opt && sudo cp -r build/ppc-unknown-linux2.2/gbdk /opt
Make sure to add the path to the new binaries to your PATH:
$ export PATH="/opt/gbdk/bin:$PATH"
Ideally, you would include that line in your .bash_profile or similar. The compiler’s front-end (called lcc) would then be easily accessible.
You could also choose to leave the binaries in-place and make a symbolic link, like so:
$ sudo ln -s build/ppc-unknown-linux2.2/gbdk /opt
In that case, you would have to adjust your PATH accordingly.
Building a minimal Game Boy game: a sanity check
Having come this far, let’s make something a bit more involved than a printf("Hello, world!"); for the Game Boy, shall we?
Create a file and then copy-paste (or type by hand!) the following code:
#include <stdio.h> 	// printf(), delay()
#include <gb/gb.h>  // joypad(), J_UP, J_DOWN, ...

void main() {

	// Loop forever
	while (1) {

		// Check the status of the Game Boy Joy Pad
		switch(joypad()) {

			// If the UP button is pressed...
			case J_UP:

				// Display "Up!" on the screen
				printf("Up!\n");

				// Then wait for half a second...
				delay(500);

				// Go back to checking the status of the Joy Pad
				break;

			// And so on
			case J_DOWN:
				printf("Down!\n");
				delay(500);
				break;

			case J_LEFT:
				printf("Left!\n");
				delay(500);
				break;

			case J_RIGHT:
				printf("Right!\n");
				delay(500);
				break;

			default:
				break;
		}
	}
}
Save the file as first.c and proceed to build the code:
$ lcc first.c -o first.gb
Hopefully everything compiled correctly! You’ll know it worked if lcc stays quiet after compiling, thus obeying The Rule of Silence.
Let’s run bgb ($ wine bgb.exe), secondary-click the window, open first.gb and check out the results!
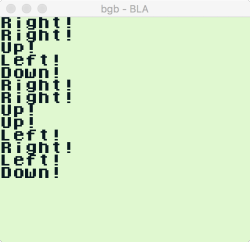
And that’s it! From code to binary that the Game Boy recognizes, built on MacOS. A world of 8-bit possibilities awaits! A more complete version of this example is available at GBDev.
The C alternative: RGBDS on MacOS
This post focused on coding in C. For assembly, there exists the Rednex Game Boy Development System (RGBDS). The best part is that installation couldn’t be simpler.
$ brew install rgbds
I will definitely get into assembly on the GB at some point in the future!
Further reading
If you can read Japanese (or don’t mind using Google Translate), I recommend the Game Boy Advent Calendar 2017 series of blog posts.
Finally, having already mentioned the place to get a lot of good resources (awesome-gbdev), I’ll go ahead and highlight a few resources on that list.
-
The Ultimate Game Boy Talk - A must-watch deep-dive tech-talk on the original Game Boy.
-
Simplified GBDK Examples - Repository containing self-contained examples on GBDK concepts. If you’d like to see the
printf("Hello, world!");of the Game Boy world, look no further! -
flappybird-gameboy - Reading the source code of other projects is a good way to get started with development in any environment. Flappy Bird is a simple enough game to make for a good first look into GB development in C using GBDK!
-
SameBoy - An active, open-source emulator written in C with a focus on MacOS support. With its debugging features, it has the potential to become the go-to emulator for development purposes on Mac!
- Making a Game Boy game in 2017: A “Sheep It Up!” Post-Mortem" - A great read chronicling the development of a Game Boy game which introduces plenty of helpful concepts along the way
Extra: Happy 29th!
Without realizing it, I uploaded this post on the on the 29th anniversary of the Game Boy’s Japanese release date! Since I was not aware of the Game Boy’s Japanese release date, there was a $\frac{1}{365} = 0.0027%$ chance of this happening! However, taking into account the time-zone difference, I actually uploaded this post at around 7:30AM on the 22nd, Japan time. Oh well, pretty cool in any case!